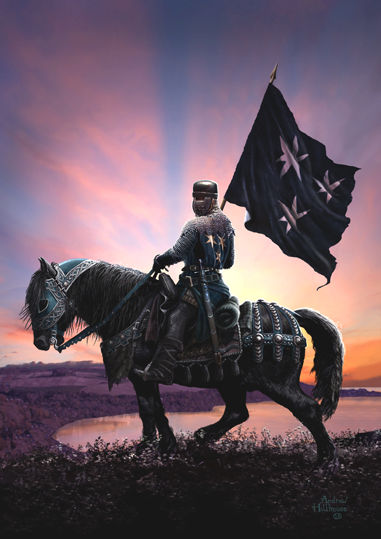
Andrew de Moray
Andrew de Moray

Andrew de Moray
Andrew Moray was born late in the second half of the 13th century, son to Sir Andrew Moray of Petty, the Justiciar of Scotia, but the exact date and place of his birth are unknown. The Morays of Petty were a wealthy and politically influential baronial family based in the province of Moray, north-eastern Scotland.
In the spring of 1296, Andrew Moray, together with his father and uncle, joined the Scottish feudal host who assembled in preparation to resist the English invasion. But the poorly led Scots forces were completely routed by the English army under John de Warrenne at the subsequent Battle of Dunbar. While the victorious English King Edward marched through the subdued realm of Scotland, the Scots nobles captured at Dunbar were taken south in chains. The most important prisoners, such as Sir Andrew Moray of Petty, were taken south to the Tower of London. Andrew de Moray the younger was imprisoned in Chester Castle while Scotland shuddered under a particularly harsh English occupation. Somehow, however, during the winter of 1296-97, he managed to escape. His father was less fortunate and ultimately died in English captivity in the Tower. Young Moray made his way back to his father's lands in the north of Scotland determined to seek revenge. And his revenge came quickly.
"In the month of May the perfidious race of Scots began to rebel." the Hemingsburgh Chronicle reports.
In the north east, Andrew de Moray proclaimed his defiance of English rule at Avoch and, in the south, a certain young hot-head named William Wallace murdered William Hesilrig, the English sheriff of Lanark, on 3 May 1297. News of both men’s actions quickly drew supporters to the cause. The Scottish kingdom had been easily conquered by King Edward but it lay restless under his rule. The early months of 1297 saw ever increasing outbreaks of violence against the English occupiers and their Scottish allies. These became so serious that officials on the ground sought assistance from the English king. The regions of Argyll, Ross, Galloway and Fife flared up in open rebellion. Royal officials were murdered and their castles and strongholds seized or destroyed by the rebels. The English king responded by ordering a rapid and brutal response. Edward's loyal supporters in Scotland were ordered to suppress the rebels and armed men were dispatched from England to assist in the crushing of the rebellion.
Sir William Fitz-Warin, the English constable of Urquhart Castle on the shores of Loch Ness, wrote to King Edward in July 1297: "Some evil disposed people have joined Andrew Moray at the castle of Avoch in Ross." De Moray quickly plunged the province of Moray into chaotic rebellion. In response, King Edward's principal followers in the area held a meeting at Inverness Castle to discuss tactics on how to deal with his threat. But, returning home after the meeting with his escort of men-at-arms, Sir William Fitz Warin, was ambushed by Andrew de Moray and his followers. He was fortunate to escape with his life to the safety of his loch-side stronghold. But next day, Sir William awoke to find his castle besieged by de Moray.
Over the coming months, de Moray’s attacks grew in audacity and ingenuity and he became the scourge of the English occupiers in the north east. Soon, he managed to regain control of the region for the legitimate King of Scotland, John Balliol. King Edward I of England, whose main concern was preparing for his impending campaign in Flanders, sought to deal with the threats posed by these separate rebellions. To counter Andrew de Moray, he forced Scots nobles released from his prisons to raise their retinues and march into Moray to restore royal authority. This armed force departed from Aberdeen in early July 1297. De Moray responded by marching east to confront it. The two forces met on the banks of the Spey at Enzie. There is no surviving account of the ensuing confrontation, but it appears that, after some discussion,
“Moray and his rebel-army withdrew into a very great stronghold of bog and wood where no horseman could be of service.”
It has been supposed that neither side wished to fight men that they did not consider their enemies here. By the late summer of 1297, de Moray had joined forces with William Wallace. Together, they rampaged through the country, brutally driving the English out of their strongholds and preventing the collection of taxes and their subsequent transportation to England.
The reality of how little authority King Edward now retained in Scotland is described in a letter to the King from Hugh de Cressingham, the despised Treasurer of the English administration in Scotland:
“by far the greater part of your counties of the realm of Scotland are still unprovided with keepers, as they have been killed or imprisoned; and some have given up their bailiwicks, and others neither will nor dare return; and in some counties the Scots have established and placed bailiffs and ministers, so that no county is in proper order, excepting Berwick and Roxburgh, and this only lately.”
Of all of the castles north of the River Forth, only Dundee remained in English hands and, by September 1297, it too was under siege by Wallace and de Moray. Edward could only re-impose his authority on Scotland with a full-scale armed invasion. Sometime late in the summer of 1297, King Edward's lieutenant in Scotland and victor of the battle of Dunbar, John de Warrenne, the earl of Surrey, mustered an army and marched north into central Scotland. Moray and Wallace responded by marching with their combined forces to Stirling to await his arrival.
Moray and Wallace deployed their small army to the north of the River Forth close to the old bridge under the shadow of Stirling Castle. Surrey's handling of the ensuing battle was extremely inept. He sent the vanguard of his army across the narrow bridge under the Scots’ gaze, expecting them to be too intimidated to attack. Unfortunately for him, the Scots did attack, when the English army was only partially deployed. In the ensuing carnage of the Battle of Stirling Bridge, Surrey's army was massacred. The bulk of his army had remained unengaged on the southern bank and it soon began to flee the scene as it became clear that Surrey had been outmanoeuvred and outfought by de Moray and Wallace.
It is estimated that Surrey lost one hundred knights and five-thousand infantrymen in the slaughter. The Scottish army's casualties remain unrecorded apart from one significant loss: Andrew de Moray had been fatally wounded in the fight. Scotland had been robbed of a supremely skilled soldier, tactician, commander and potential leader of the realm.
The exact circumstances of his death remain unknown. At a formal inquisition in November 1300 it was determined that Andrew de Moray was: "slain at Stirling against the king." However, there is mention of him still being alive in two letters issued after Stirling Bridge. The first letter, sent from Haddington on 11 October to the mayors of Lübeck and Hamburg was issued by: "Andrew de Moray and William Wallace, leaders of the kingdom of Scotland and the community of the realm." The second was issued to the prior of Hexham on 7 November by: "Andrew de Moray and William Wallace, the leaders of the army and of the realm of Scotland." Most historians have deduced from this that de Moray was injured at Stirling Bridge and died of his injuries around November 1297.
The subsequent well deserved legend of Wallace has resulted in the achievements of Andrew de Moray disappearing into the mists of time. Although there are many statues to Wallace scattered across Scotland and the world, there is no similar monument to de Moray.
The name of Andrew de Moray did not disappear, however. A few months after his death, his widow bore him a son, also named Andrew. The child acceded to the lordships of Petty and Bothwell and played a decisive role in defeating the attempts of Edward III of England, the grandson of the so-called 'Hammer of the Scots', to conquer Scotland in the 1330s. Sir Andrew would twice be regent for King David II, the son of King Robert I, and would display a remarkably similar aptitude to that shown by his father for leading Scotland's armies. And, like his father, he, too, would die prematurely in defence of the realm.
Scotland has always paid dear for her freedom.

Buy this print online:

 
Item added to cart
Andrew de Moray

Andrew de Moray
Andrew Moray was born late in the second half of the 13th century, son to Sir Andrew Moray of Petty, the Justiciar of Scotia, but the exact date and place of his birth are unknown. The Morays of Petty were a wealthy and politically influential baronial family based in the province of Moray, north-eastern Scotland.
In the spring of 1296, Andrew Moray, together with his father and uncle, joined the Scottish feudal host who assembled in preparation to resist the English invasion. But the poorly led Scots forces were completely routed by the English army under John de Warrenne at the subsequent Battle of Dunbar. While the victorious English King Edward marched through the subdued realm of Scotland, the Scots nobles captured at Dunbar were taken south in chains. The most important prisoners, such as Sir Andrew Moray of Petty, were taken south to the Tower of London. Andrew de Moray the younger was imprisoned in Chester Castle while Scotland shuddered under a particularly harsh English occupation. Somehow, however, during the winter of 1296-97, he managed to escape. His father was less fortunate and ultimately died in English captivity in the Tower. Young Moray made his way back to his father's lands in the north of Scotland determined to seek revenge. And his revenge came quickly.
"In the month of May the perfidious race of Scots began to rebel." the Hemingsburgh Chronicle reports.
In the north east, Andrew de Moray proclaimed his defiance of English rule at Avoch and, in the south, a certain young hot-head named William Wallace murdered William Hesilrig, the English sheriff of Lanark, on 3 May 1297. News of both men’s actions quickly drew supporters to the cause. The Scottish kingdom had been easily conquered by King Edward but it lay restless under his rule. The early months of 1297 saw ever increasing outbreaks of violence against the English occupiers and their Scottish allies. These became so serious that officials on the ground sought assistance from the English king. The regions of Argyll, Ross, Galloway and Fife flared up in open rebellion. Royal officials were murdered and their castles and strongholds seized or destroyed by the rebels. The English king responded by ordering a rapid and brutal response. Edward's loyal supporters in Scotland were ordered to suppress the rebels and armed men were dispatched from England to assist in the crushing of the rebellion.
Sir William Fitz-Warin, the English constable of Urquhart Castle on the shores of Loch Ness, wrote to King Edward in July 1297: "Some evil disposed people have joined Andrew Moray at the castle of Avoch in Ross." De Moray quickly plunged the province of Moray into chaotic rebellion. In response, King Edward's principal followers in the area held a meeting at Inverness Castle to discuss tactics on how to deal with his threat. But, returning home after the meeting with his escort of men-at-arms, Sir William Fitz Warin, was ambushed by Andrew de Moray and his followers. He was fortunate to escape with his life to the safety of his loch-side stronghold. But next day, Sir William awoke to find his castle besieged by de Moray.
Over the coming months, de Moray’s attacks grew in audacity and ingenuity and he became the scourge of the English occupiers in the north east. Soon, he managed to regain control of the region for the legitimate King of Scotland, John Balliol. King Edward I of England, whose main concern was preparing for his impending campaign in Flanders, sought to deal with the threats posed by these separate rebellions. To counter Andrew de Moray, he forced Scots nobles released from his prisons to raise their retinues and march into Moray to restore royal authority. This armed force departed from Aberdeen in early July 1297. De Moray responded by marching east to confront it. The two forces met on the banks of the Spey at Enzie. There is no surviving account of the ensuing confrontation, but it appears that, after some discussion,
“Moray and his rebel-army withdrew into a very great stronghold of bog and wood where no horseman could be of service.”
It has been supposed that neither side wished to fight men that they did not consider their enemies here. By the late summer of 1297, de Moray had joined forces with William Wallace. Together, they rampaged through the country, brutally driving the English out of their strongholds and preventing the collection of taxes and their subsequent transportation to England.
The reality of how little authority King Edward now retained in Scotland is described in a letter to the King from Hugh de Cressingham, the despised Treasurer of the English administration in Scotland:
“by far the greater part of your counties of the realm of Scotland are still unprovided with keepers, as they have been killed or imprisoned; and some have given up their bailiwicks, and others neither will nor dare return; and in some counties the Scots have established and placed bailiffs and ministers, so that no county is in proper order, excepting Berwick and Roxburgh, and this only lately.”
Of all of the castles north of the River Forth, only Dundee remained in English hands and, by September 1297, it too was under siege by Wallace and de Moray. Edward could only re-impose his authority on Scotland with a full-scale armed invasion. Sometime late in the summer of 1297, King Edward's lieutenant in Scotland and victor of the battle of Dunbar, John de Warrenne, the earl of Surrey, mustered an army and marched north into central Scotland. Moray and Wallace responded by marching with their combined forces to Stirling to await his arrival.
Moray and Wallace deployed their small army to the north of the River Forth close to the old bridge under the shadow of Stirling Castle. Surrey's handling of the ensuing battle was extremely inept. He sent the vanguard of his army across the narrow bridge under the Scots’ gaze, expecting them to be too intimidated to attack. Unfortunately for him, the Scots did attack, when the English army was only partially deployed. In the ensuing carnage of the Battle of Stirling Bridge, Surrey's army was massacred. The bulk of his army had remained unengaged on the southern bank and it soon began to flee the scene as it became clear that Surrey had been outmanoeuvred and outfought by de Moray and Wallace.
It is estimated that Surrey lost one hundred knights and five-thousand infantrymen in the slaughter. The Scottish army's casualties remain unrecorded apart from one significant loss: Andrew de Moray had been fatally wounded in the fight. Scotland had been robbed of a supremely skilled soldier, tactician, commander and potential leader of the realm.
The exact circumstances of his death remain unknown. At a formal inquisition in November 1300 it was determined that Andrew de Moray was: "slain at Stirling against the king." However, there is mention of him still being alive in two letters issued after Stirling Bridge. The first letter, sent from Haddington on 11 October to the mayors of Lübeck and Hamburg was issued by: "Andrew de Moray and William Wallace, leaders of the kingdom of Scotland and the community of the realm." The second was issued to the prior of Hexham on 7 November by: "Andrew de Moray and William Wallace, the leaders of the army and of the realm of Scotland." Most historians have deduced from this that de Moray was injured at Stirling Bridge and died of his injuries around November 1297.
The subsequent well deserved legend of Wallace has resulted in the achievements of Andrew de Moray disappearing into the mists of time. Although there are many statues to Wallace scattered across Scotland and the world, there is no similar monument to de Moray.
The name of Andrew de Moray did not disappear, however. A few months after his death, his widow bore him a son, also named Andrew. The child acceded to the lordships of Petty and Bothwell and played a decisive role in defeating the attempts of Edward III of England, the grandson of the so-called 'Hammer of the Scots', to conquer Scotland in the 1330s. Sir Andrew would twice be regent for King David II, the son of King Robert I, and would display a remarkably similar aptitude to that shown by his father for leading Scotland's armies. And, like his father, he, too, would die prematurely in defence of the realm.
Scotland has always paid dear for her freedom.

Buy this print online:

 
Item added to cart